Coating Thickness Gauge

Coating Thickness Gauge


Coating thickness gauge is used to measure the coating wall of metels and other material.It uses digital pocess technology,accuracy, and light.

Codes explaining:
F means coathing thickness gauge can only use F TYPE magnetic induction measuring method.
N means coathing thickness gauge can only use NF TYPE eddy current measuring method.
FN means coathing thickness gauge can use both F TYPE magnetic induction and NF TYPE eddy current measuring methods.

F type magnetic induction-coathing thickness gauge
Can measure the thickness of non-magnetic coating layers covered on magnetic substrate.
such as: thickness of layer (aluminum, chrome, copper, zinc, tin, lead, cadmium, porcelain, powder,  enamel, rubber, paint, plastic, anodic-oxide) on magnetic substrate (steel, iron, alloy and magnetic stainless steel).
It doesn’t matter if the layers are conductive or nonconductive, but must be not magnetic.

NF type eddy current-coathing thickness gauge
Can measure the thickness of nonconductive coating layers covered on nonferrous substrate.   
Such as: thickness of layer (enamel, rubber, paint, vanish, plastic, anodic-oxide layer) covered on nonferrous substrate (aluminum, brass, zinc, tin and nonmagnetic stainless steel, gold, silver)
The layers must be nonconductive.

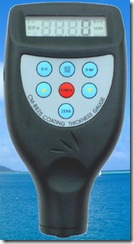
1290644339_33 Coating Thickness Meter CM-8825F, CM-8825N, CM-8825FN    With probe built-in
Operating principle: magnetic induction/eddy current (F/NF)
Measuring range: 0-1250um/0-50mil
Resolution: 0.1/1
Accuracy: ±1-3%n or ±2.5um
Min. measuring area: 6mm
Min. sample thickness: 0.3mm
Battery indicator: low battery indicator
Metric/imperial: convertible
Power supply: 4×1.5V AAA(UM-4) battery
Auto power off
Operating conditions:0-+45℃ (32F-104F), 90%RH max
Dimensions: 126 x 65 x 27mm
weight: 81g (not including battery)
Optional accessories: other range 0-200um to 15000um
1290644432_60 Coating Thickness Meter CM-8826F, CM-8826N, CM-8826FN    With probe separated
Operating principle: magnetic induction / eddy current
Measuring range: 0-1250um/0-50mil
Resolution: 0.1/1
Accuracy: ±1-3%n or ±2.5um
Min. measuring area: 6mm
Min. sample thickness: 0.3mm
Battery indicator: low battery indicator
Metric/ imperial: convertible
Power supply: 4 x 1.5V AAA (UM-4) battery
Auto power off
Operating conditions:0 ~ +45℃ (32℉-104℉), 90%RH max
Dimensions: 126x65x27mm
weight: 81g (not including battery)
Optional accessories: other range 0-200um to 15000um
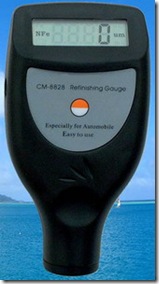
1290644523_43 Coating Thickness Meter CM-8828F, CM-8828N, CM-8828FN   With probe built-in
Especially for automobile
Operating principle: magnetic induction / eddy current
Measuring range: 0-1250um/0-50mil
Resolution: 0.1/1
Accuracy: ±1-3%n or ±2.5um
Min. measuring area: 6mm
Min. sample thickness: 0.3mm
Battery indicator: low battery indicator
Metric/ imperial: convertible
Power supply: 4 x 1.5V AAA (UM-4) battery
Auto power off
Operating conditions:0 ~ +45℃ (32℉-104℉), 90%RH max
Dimensions: 126x65x27mm
weight: 81g (not including battery)
Optional accessories: other range 0-200um to 15000um
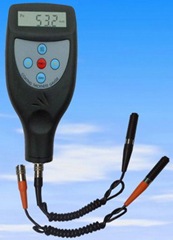
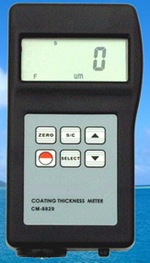
1290644542_14 Coating Thickness Meter CM-8829F, CM-8829N, CM-8829FN    With probe separated
Operating principle: magnetic induction / eddy current Measuring range: 0-1250um/0-50mil
Resolution: 0.1/1
Accuracy: ±1-3%n or ±2.5um
Min. measuring area: 6mm
Min. sample thickness: 0.3mm
Battery indicator: low battery indicator
Metric/ imperial: convertible
Power supply: 4 x 1.5V AAA (UM-4) battery
Auto power off
Operating conditions:0 ~ +45℃ (32℉-104℉), 90%RH max
Dimensions: 126x65x27mm
weight: 81g (not including battery)
Optional accessories: other range 0-200um to 15000um
1290644878_20 This meter measures coating film thickness of all non-magnetic coatings such as varnish, paint, enamel, chrome, copper, zircon… on non-ferrous metal base materials.
Also electrically insulating coatings, such as lacquer, paint and anodising coatings on non-ferrous metals are accurately measured.

1.MODEL:CM-8823  Only NF
2.Measuring principle: eddy current
3.MEASUREMENT RANGE
0~200um/500um/1000um/~15000um
4.RESOLUTION: 0.1/1
5.TOLERANCE:  ±(1~3%n) or ±2um
6.POWER SUPPLY:4X1.5V AA(UM-3)BATTERY
7.DIMENSION: 161X69X32

1290644900_88 The F probe is for measuring the thickness of non-magnetic coating layers (aluminum,chrome,copper,ename1,rubber,paint) on magnetic substrate (steel, iron, alloy and magnetic steel) 
The N probes is suitable both for the laboratory and for use in harsh field conditions. This meter measures coating film thickness of all non-magnetic coatings such as varnish, paint, enamel, chrome, copper, zircon… on non-ferrous metal base materials.
Also electrically insulating coatings, such as lacquer, paint and anodising coatings on non-ferrous metals are accurately measured.
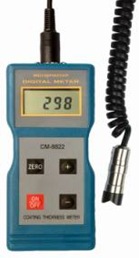
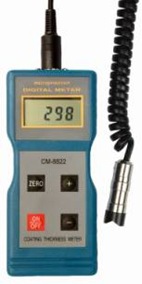
1.MODEL:CM-8822 (F&NF)
2.Measuring principle:MAGNETIC/eddy current
3.MEASUREMENT RANGE
  0~200um/500um/1000um/~15000um
4.RESOLUTION:0.1/1
5.ACCURACY:Accuracy: ±1-3%n or ±2.5um
6.POWER SUPPLY:4X1.5V AA(UM-3)BATTERY
7.DIMENSION:161X69X32mm
1290644937_90 Designed for measuring the thickness of non-magnetic coating layers (aluminum,chrome,copper,ename1,rubber,paint) on magnetic substrate (steel, iron, alloy and magnetic steel)

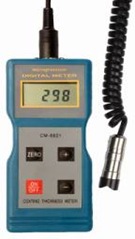
1.MODEL:CM-8821  Only F
2.Measuring principle: MAGNETIC
3.MEASUREMENT RANGE:
0~200um/500um/1000um/~15000um
4.RESOLUTION : 0.1/1
5.ACCURACY : ±(1~3%n) or ±2um
6.POWER SUPPLY: 4X1.5V AA(UM-3)BATTERY
7.DIMENSION: 161X69X32mm

Reference picture Technical Specification

Coating Thickness Meter with Function Data Recording
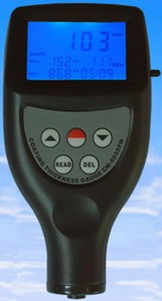
cm8855 CM8855 coating thickness meter (with probes in built)

1.FEATURES

* It meets the standards of both ISO2178 and ISO 2361 as well as DIN, ASTM and BS. It can be used both in the laboratory and in harsh field conditions.

* The F probes measure the thickness of non-magnetic materials (e.g. paint, plastic, porcelain enamel, copper, zinc, aluminum , chrome etc.) on magnetic materials (e.g. iron, nickel etc.) . often used to measure the thickness of galvanizing layer, lacquer layer, porcelain enamel layer, phosphide layer, copper tile, aluminum tile, some alloy tile, paper etc.

* The N probes measure the thickness of non-magnetic coatings on non-magnetic metals. It is used on anodizing, varnish, paint, enamel, plastic coatings, powder, etc. applied to aluminum, brass, non-magnetic stainless steel, etc.

* Automatic substrate recognition.

* Manual or automatic shut down.

* Two measurement mode: Single and Continuous

* Wide measuring range and high resolution.

* Metric/Imperial conversion.

* Digital backlit display gives exact reading with no guessing or errors.

* Can communicate with PC computer for statistics and printing by the optional cable.

* Can store 99 groups of measurements.

* Statistics is available.

2.SPECIFICATIONS

Display: 4 digits LCD, backlit

Range: 0~1250 μm/0~50mil (other ranges can be specified )

Min.radius workpiece: F: Convex 1.5mm/Concave 25mm

N: Convex 3mm/ Concave 50mm

Min. measuring area: 6mm

Min.Sample thickness : 0.3mm

Resolution: 0.1 μm (0~99.9μm); 1 μm (over 100μm)

Accuracy: ±1~3%n or 2.5 μm or 0.1mil (Whichever is the greater)

Bttery Indicator: Low batter indicator.

PC interface: with RS-232C interface

Power supply: 2×1.5 AAA(UM-4) battery

Operating condition: Temp. 0~50℃ .

Humidity <95% .

Size: 126x65x35 mm;  5.0×2.6×1.6 inch

Weight: about 81g(not including batteries)

Standard accessories:

Carrying case ……………….1 pc.

Operation manual ………… 1 pc.

F probe built-in ……………..1 pc.

NF probe built-in……………1 pc.

Calibration foils …………..1set.

Substrate (Iron) …………….1 pc.

Substrate (Aluminium)……1 pc.

Optional accessories: RS-232C cable & software:USB adaptor for RS-232C

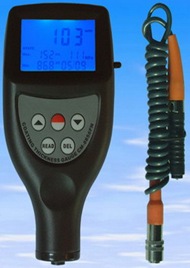
cm8856 CM8856 coating thickness meter  (with probes separated)

1.FEATURES

* It meets the standards of both ISO2178 and ISO 2361 as well as DIN, ASTM and BS. It can be used both in the laboratory and in harsh field conditions.

* The F probes measure the thickness of non-magnetic materials (e.g. paint, plastic, porcelain enamel, copper, zinc, aluminum , chrome etc.) on magnetic materials (e.g. iron, nickel etc.) . often used to measure the thickness of galvanizing layer, lacquer layer, porcelain enamel layer, phosphide layer, copper tile, aluminum tile, some alloy tile, paper etc.

* The N probes measure the thickness of non-magnetic coatings on non-magnetic metals. It is used on anodizing, varnish, paint, enamel, plastic coatings, powder, etc. applied to aluminum, brass, non-magnetic stainless steel, etc.

* Automatic substrate recognition.

* Manual or automatic shut down.

* Two measurement mode: Single and Continuous

* Wide measuring range and high resolution.

* Metric/Imperial conversion.

* Digital backlit display gives exact reading with no guessing or errors.

* Can communicate with PC computer for statistics and printing by the optional cable.

* Can store 99 groups of measurements.

* Statistics is available.

2.SPECIFICATIONS

Display: 4 digits LCD, backlit

Range: 0~1250 μm/0~50mil (other ranges can be specified )

Min.radius workpiece: F: Convex 1.5mm/Concave 25mm

N: Convex 3mm/ Concave 50mm

Min. measuring area: 6mm

Min.Sample thickness : 0.3mm

Resolution: 0.1 μm (0~99.9μm); 1 μm (over 100μm)

Accuracy: ±1~3%n or 2.5 μm or 0.1mil (Whichever is the greater)

Bttery Indicator: Low batter indicator.

PC interface: with RS-232C interface

Power supply: 2×1.5 AAA(UM-4) battery

Operating condition: Temp. 0~50℃ .

Humidity <95% .

Size: 126x65x35 mm;  5.0×2.6×1.6 inch

Weight: about 81g(not including batteries)

Standard accessories:

Carrying case ……………….1 pc.

Operation manual ………… 1 pc.

F probe separate ……………..1 pc.

NF probe separate……………1 pc.

Calibration foils …………..1set.

Substrate (Iron) …………….1 pc.

Substrate (Aluminium)……1 pc.

Optional accessories: RS-232C cable & software:USB adaptor for RS-232C

Scroll to Top